Transforming your kitchen’s ventilation from ducted to ductless can seem daunting, especially when external venting isn’t an option. Whether you live in an apartment, a home without existing ductwork, or simply prefer a more flexible setup, a recirculating kit offers a practical solution. These kits enable your range hood to filter cooking odors and grease, returning cleaner air to your kitchen without needing to vent outside. This guide will walk you through the essential steps to successfully install a recirculating kit on your range hood, ensuring a fresher and more pleasant cooking environment.
Understanding Recirculating Range Hood Systems
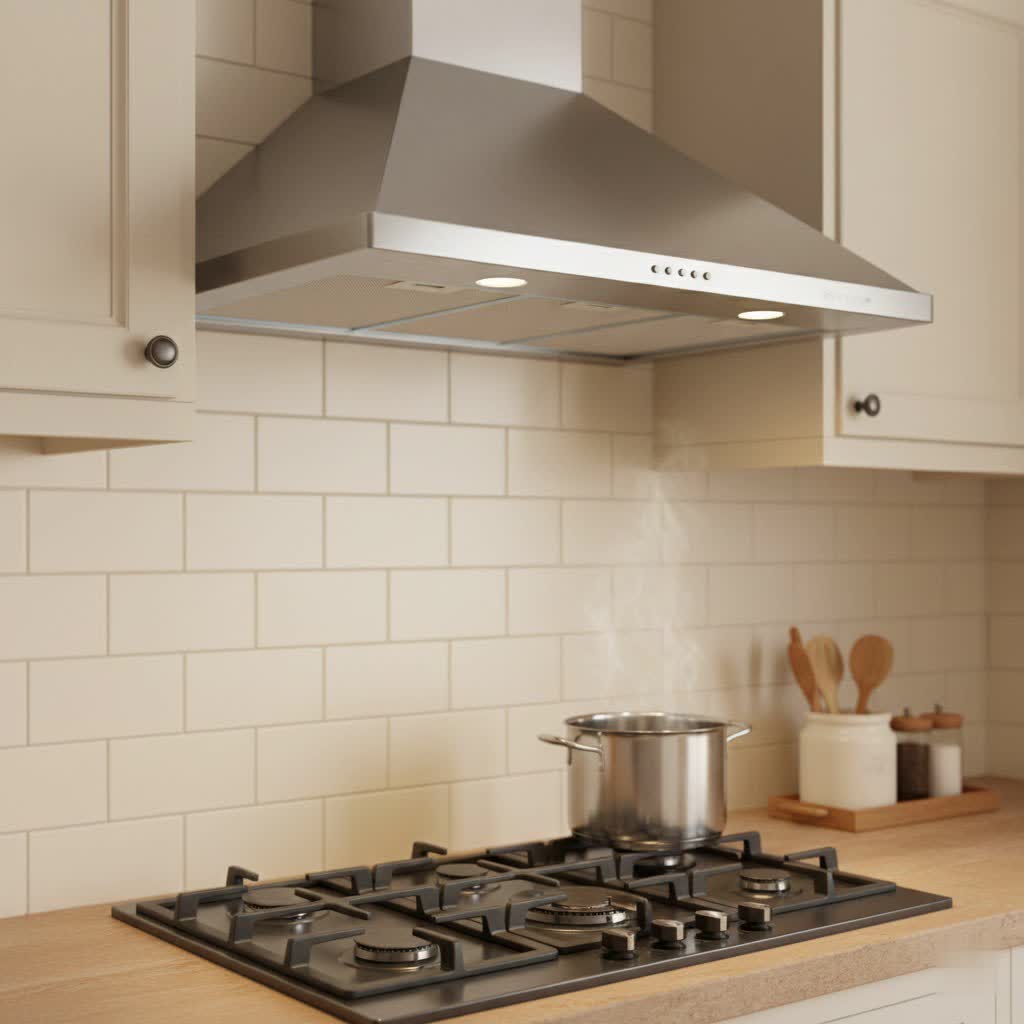
A recirculating, or ductless, range hood system operates by drawing in cooking fumes, passing them through a series of filters, and then releasing the purified air back into the kitchen. Unlike ducted systems that expel air outdoors, recirculating hoods do not require complex ductwork, making them a popular choice for many modern homes and apartments. The core of this system is the recirculating kit, which primarily consists of specialized charcoal (carbon) filters designed to trap odors and fine particles.
Recirculating kits are adaptable to various range hood types, including under-cabinet, wall-mount, and island hoods. While the fundamental principle remains the same, the exact installation process for the kit may differ slightly depending on your specific range hood model and where the filtered air is designed to exit (e.g., through a front vent or upward into the cabinet above). The primary advantage of a ductless setup is its installation flexibility and often lower initial installation cost, as it eliminates the need for external venting. Before beginning, always verify that the recirculating kit is compatible with your specific range hood model to ensure optimal performance and a proper fit.
Essential Tools and Safety First
Before you start the installation, gathering the right tools and prioritizing safety are paramount. A well-prepared workspace will make the process smoother and safer.
Here’s a checklist of tools you’ll likely need:
- Drill and drill bits: For pilot holes and securing mounting hardware.
- Screwdrivers: Both Phillips and flathead, to accommodate various screws.
- Measuring tape and pencil: For accurate measurements and marking.
- Level: To ensure your range hood and any kit components are straight.
- Stud finder: To locate wall studs for secure mounting (if installing a new hood).
- Wire stripper and electrical circuit tester: If hardwiring your hood or installing a new electrical outlet.
- Safety glasses and gloves: Essential for personal protection.
- Optional but helpful: A helper to assist with lifting and securing the hood.
Safety Precautions:
The most critical safety step is to turn off the power to the circuit breaker that supplies electricity to your range hood area. Always use an electrical circuit tester to confirm the power is off before handling any wires. Wearing safety glasses will protect your eyes from dust or debris, and gloves can prevent cuts and scrapes. Always refer to your range hood and recirculating kit’s user manuals for model-specific instructions and additional safety guidelines. Ignoring these precautions can lead to electrical shock or injury.
Preparing Your Range Hood for the Recirculating Kit
Proper preparation ensures a seamless installation of your recirculating kit. This phase involves unboxing, initial checks, and readying the range hood itself.
First, unpack your recirculating kit and inspect all components. Ensure that all filters, clamps, and any air diverters are present and undamaged. Cross-reference the contents with your kit’s manual. If you’re installing a new range hood that will be ductless from the start, you’ll need to mount the hood according to its instructions first, making sure it’s securely attached to wall studs or cabinets and correctly wired to its power source. For existing hoods, this step is often just about making sure the hood is stable and its electrical connection is sound.
Next, conduct pre-installation checks. Confirm that you have adequate clearance above your cooktop as specified by your range hood’s manual (typically 28-36 inches). Verify that an appropriate electrical outlet is available and easily accessible; extension cords should not be used for range hoods.
To prepare the range hood itself, you’ll typically start by removing any existing grease filters (baffle or mesh) from the underside of the hood. This provides access to the motor and fan assembly where the charcoal filters will be installed. If your hood was previously ducted, ensure any duct openings are sealed or covered as per the manufacturer’s instructions. This prevents unfiltered air from recirculating prematurely or escaping into unintended spaces.
Step-by-Step Recirculating Kit Installation
The heart of the process is attaching the recirculating kit components, primarily the charcoal filters, which are responsible for purifying the air.
1. Attaching Charcoal Filters:
This is the most common step for converting to ductless operation. Charcoal filters are typically installed near the motor or fan assembly inside the hood.
- Twist-and-lock: Many charcoal filters are designed to twist and lock directly onto specific points around the motor or blower housing. Align the filter’s tabs with the corresponding slots on the motor, push gently, and then twist to secure it into place.
- Clip-on/Clamp: Some kits provide charcoal filters that clip onto or are clamped to existing mesh or baffle filters. In this scenario, you would place the charcoal filter over your existing grease filter, often with a wire screen facing down, and use provided clamps or integrated clips to hold it firmly in place.
- Specific Diverter Housing: For certain models, especially chimney-style hoods, the charcoal filters might sit within a separate air diverter box or housing that attaches to the top of the range hood before the chimney cover is installed. This housing directs the filtered air out through specific vents, often located at the top or front of the chimney.
2. Installing Air Diverter or Grate (if applicable):
If your recirculating kit includes a separate air diverter unit, it’s designed to redirect the filtered air back into the kitchen. This might involve:
- Mounting to the hood: The diverter box will sit on top of the range hood, secured with screws, and connect to the fan’s exhaust port.
- Cabinet integration: For under-cabinet hoods, this often means drilling specific holes in the top of the cabinet directly above the hood to allow the filtered air to vent back into the room through a grille or opening. The recirculating kit is then typically secured to the cabinetry above, ensuring a tight seal for proper airflow.
Always consult your specific kit’s instructions for precise placement and fastening methods, as these can vary significantly between brands and models.
3. Reinstalling Existing Grease Filters:
Once the charcoal filters and any diverter components are securely in place, carefully reinstall your original aluminum mesh or baffle grease filters into the underside of the hood. These filters are crucial for capturing grease particles, preventing them from reaching the charcoal filters and extending their lifespan.
Final Checks and Testing
With the recirculating kit installed, it’s time for the crucial final steps: testing your new setup to ensure everything is functioning correctly and safely.
1. Restore Power Safely:
Once all components are installed and secured, and you’ve double-checked all connections, return to your electrical panel and carefully switch the power back on to the circuit.
2. Test Fan and Lights:
Turn on your range hood. Test all fan speeds to ensure the motor operates smoothly and quietly (for a recirculating unit). Also, check that all lights are working as expected. This confirms that your electrical connections are correct.
3. Verify Air Recirculation:
With the fan running, place your hand near the designated air outlet vents. For most recirculating hoods, this will be a vent or grille on the front of the hood, or sometimes through openings in the top of the chimney. You should feel air being expelled, indicating that the system is properly filtering and returning air to the kitchen. If you don’t feel airflow, or if the hood is excessively noisy, refer to your manual for troubleshooting.
Maintaining Your Ductless System for Peak Performance
Proper maintenance is vital for ensuring your recirculating range hood continues to effectively remove odors and grease. Neglecting maintenance can lead to reduced efficiency and a less fresh kitchen.
1. Regular Cleaning of Grease Filters:
The aluminum mesh or baffle filters should be cleaned regularly, typically every 2-4 weeks, depending on your cooking frequency. These filters trap grease, and a buildup will restrict airflow, reducing your hood’s effectiveness. Most are dishwasher-safe or can be cleaned by hand with hot, soapy water.
2. Replacing Charcoal Filters:
Unlike grease filters, charcoal (carbon) filters cannot be washed and reused. They absorb odors and particles and will eventually become saturated. For optimal performance, charcoal filters should be replaced every 3-6 months, or more frequently if you cook often or prepare dishes with strong odors. The exact replacement schedule will depend on your usage habits and the manufacturer’s recommendations. Regular replacement ensures your hood continues to effectively neutralize smells and maintain air quality.
3. Troubleshooting Common Issues:
If you notice a decrease in airflow, increased noise, or lingering odors, it’s likely time to clean your grease filters or replace your charcoal filters. Always consult your range hood’s manual for specific troubleshooting tips for your model. Adhering to a consistent maintenance schedule will significantly prolong the life of your recirculating kit and keep your kitchen air clean.
“A well-maintained recirculating range hood, with its regularly changed carbon filters, can make a surprising difference in kitchen air quality, especially in homes where external venting isn’t feasible.” – [Your Name/Role, e.g., Admin, Reviewike.com], Kitchen Appliance Technician
Conclusion
Installing a recirculating kit on your range hood is a practical and rewarding DIY project that provides effective ventilation without the complexities of external ductwork. By carefully following the steps for preparation, installation, and testing, you can transform your kitchen into a fresher, more comfortable space. Remember to always prioritize safety, consult your product manuals for specific guidance, and commit to regular maintenance to ensure your ductless system performs optimally for years to come. Enjoy your enhanced cooking experience and the cleaner air it brings!
Have you found a recirculating kit to be the perfect ventilation solution for your kitchen?
Frequently Asked Questions
How often should I replace charcoal filters in a recirculating hood?
|
Our Picks for the Best Range hood in 2026
As an Amazon Associate I earn from qualifying purchases.
|
||
| Num | Product | Action |
|---|---|---|
| 1 | COMFEE' CVU30W4AST 30 inch Under Cabinet Ducted/Ductless Convertible Slim Vent Durable Stainless Steel Kitchen Reusable Filter, 3 Speed Exhaust Fan and 1 LED Lights Range Hood, 2.0 Version |

|
| 2 | AMZCHEF Under Cabinet Range Hood 30 Inch, 750CFM Stainless Steel Kitchen Stove Vent Hood 3 Speed Exhaust Fan Touch/Remote/Gesture Control LED lights Time Setting Dishwasher-Safe Baffle Filters |
|
| 3 | COSMO COS-63175S 30 in. Vista Collection 380 CFM Ducted Wall Mount Range Hood, Touch Controls, LED Lights, Stainless Steel |
|
| 4 | COMFEE' CVU30W2AST Range Hood 30 Inch Ducted Ductless Vent Hood Durable Stainless Steel Kitchen Hood for Under Cabinet with 2 Reusable Filter, 200 CFM, 2 Speed Exhaust Fan Silver |
|
| 5 | SNDOAS 30 inch Range Hood Ducted/Ductless Convertible Stainless Steel Range Hood Under Cabinet with Rocker Button Control,Vent Hood with LED Light,2 Speed Exhaust Fan,Under Cabinet Hood,Silver |
|
| 6 | VIKIO HOME Wall Mount Range Hood 30 inch, 580 CFM, Ducted/Ductless Convertible, Stainless Steel Kitchen Vent Hood with 3-Speed Fan and LED Lights |
|
| 7 | Empava Wall Mount Range Hood 30 Inch, Ducted/Ductless Kitchen Exhaust Stove Vent with Modern Style, 400CFM, 3-Speed, Touch Control, Timer, LED Lights, Stainless Steel (Charcoal-Filter Sold Separately) |
|
| 8 | Broan-NuTone BCSQ130SS Three-Speed Glacier Under-Cabinet Range Hood with LED Lights ADA Capable, 1.5 Sones, 375 Max Blower CFM, 30-Inch, Stainless Steel |
|
| 9 | Broan-NuTone 413001 Non-Ducted Ductless Range Hood with Lights Exhaust Fan for Under Cabinet, 30-Inch, White |
|
| 10 | IKTCH 30-inch Wall Mount Range Hood 900 CFM Ducted/Ductless Convertible, Kitchen Chimney Vent Stainless Steel with Gesture Sensing & Touch Control Switch Panel, 2 Pcs Adjustable Lights(IKP02-30'') |
|
Charcoal filters typically need to be replaced every 3 to 6 months. This frequency can vary based on how often you cook and the types of food you prepare. Heavy use or cooking strong-smelling foods may necessitate more frequent changes to maintain optimal odor absorption.
Can I wash and reuse charcoal filters?
No, charcoal filters are designed for single-use and cannot be washed or reused. Washing them will destroy the activated carbon’s ability to absorb odors and particulates, rendering them ineffective. Always replace them with new, compatible filters.
Are recirculating range hoods as effective as ducted ones?
While recirculating hoods significantly improve kitchen air quality by filtering grease and odors, they are generally less effective than ducted hoods, which remove air completely from the home. Ducted systems offer superior performance for heavy cooking and moisture removal.
What are the main advantages of a recirculating hood over a ducted hood?
The main advantages of a recirculating hood are easier and more flexible installation, as they do not require external ductwork, making them ideal for apartments or kitchens where external venting is not possible or cost-prohibitive. They are also simpler to install as a DIY project.
What tools are essential for installing a recirculating kit?
Key tools include a drill, screwdrivers, a measuring tape, and a level. For electrical work, a wire stripper and an electrical circuit tester are crucial. Always have safety glasses and gloves, and refer to your specific product manual for any specialized tools.