Imagine walking into a room that’s consistently too hot in winter or too cold in summer, despite your thermostat being set perfectly. This frustrating scenario is often a tell-tale sign of a hidden culprit: a stuck damper flap within your HVAC ductwork. These unassuming components play a critical role in directing airflow throughout your home, ensuring balanced temperatures and efficient system operation. When a damper gets jammed, it can lead to uncomfortable living spaces, increased energy bills, and even strain on your heating and cooling system. But before you call for professional help, many common damper issues can be resolved with a bit of DIY know-how. This comprehensive guide will walk you through diagnosing, troubleshooting, and fixing a stuck damper flap, empowering you to restore comfort and efficiency to your home.
Understanding HVAC Dampers
Dampers are essentially valves or plates strategically placed inside your ductwork that regulate or stop the flow of air. They are vital for controlling airflow to different zones or rooms, allowing you to customize heating and cooling. Without properly functioning dampers, your HVAC system struggles to distribute air effectively, leading to inconsistent temperatures and wasted energy.
There are two primary types of dampers you’ll typically find in residential HVAC systems:
- Manual Dampers: These are the simplest type, operated by a lever or screw located on the exterior of the ductwork. You manually adjust them to open, close, or partially restrict airflow to specific areas. They are robust and easy to understand but require physical adjustment for any changes.
- Automatic (Zone) Dampers: More sophisticated, these dampers are motorized and often controlled by a central zoning system or individual thermostats in different rooms. They automatically adjust based on programmed settings or real-time temperature demands, offering precise and effortless climate control. They typically have an actuator or motor that moves the damper blade.
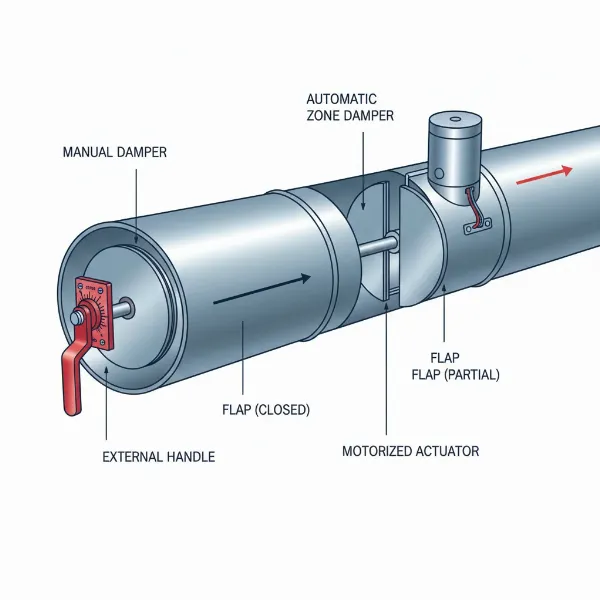 Illustration of HVAC ductwork with a manual damper handle and an automatic zone damper for understanding components.
Signs Your Damper Flap is Stuck
Identifying a stuck damper is the first step toward fixing it. The symptoms often manifest as uncomfortable changes in your home’s environment. Keep an eye out for these common indicators:
- Uneven Temperatures: This is the most common sign. If some rooms are noticeably hotter or colder than others, even when your HVAC system is running, a damper might not be opening or closing correctly.
- Reduced Airflow: Place your hand near the vents in different rooms. If a specific room or zone has significantly weaker airflow compared to others, or no airflow at all, it suggests a damper is stuck in a partially closed or fully closed position.
- Noises from Ductwork: While less common, a stuck damper might occasionally produce rattling, whistling, or banging noises, especially if it’s partially dislodged or struggling to move. Sometimes, a slight tap on the ductwork near a damper can temporarily free it, indicating it was indeed stuck.
- Thermostat Imbalance: For homes with zoning systems, the thermostats in affected zones may struggle to reach their set temperatures, constantly calling for heating or cooling without success.
Common Causes of a Stuck Damper
Dampers can get stuck for various reasons, ranging from simple obstructions to mechanical failures. Understanding the root cause is crucial for an effective repair.
- Accumulation of Dust and Debris: Over time, dust, pet hair, insulation fibers, and other debris can build up around the damper flap, preventing it from moving freely. This is especially common in older ductwork or systems without proper filtration.
- Loose or Broken Components: For both manual and automatic dampers, the linkage connecting the external handle or motor to the internal flap can become loose, dislodged, or even break. A loose nut on the damper shaft is a frequent culprit for manual dampers.
- Corrosion or Rust: Dampers made of metal can rust or corrode, particularly in humid environments or if exposed to moisture, causing the flap to seize up.
- Motor or Actuator Failure (Automatic Dampers): The small electric motor (actuator) that controls automatic dampers can fail due to age, electrical issues, or physical damage. If the motor isn’t receiving power or is burnt out, the damper will remain in its last position.
- Misalignment: The damper flap or its shaft might become misaligned within the duct, causing it to bind against the duct walls and preventing smooth operation.
- Manual Lock Engaged (Rare): Some manual dampers have a locking mechanism that, if accidentally engaged, can prevent the damper from moving.
Tools and Safety Precautions for Damper Repair
Before you begin any repair work on your HVAC system, it’s essential to gather the necessary tools and prioritize safety.
Essential Tools:
- Screwdrivers: Phillips and flathead for accessing ductwork, tightening screws, or adjusting manual dampers.
- Work Gloves: To protect your hands from sharp sheet metal edges and dust.
- Safety Goggles: To shield your eyes from debris.
- Duct Tape or HVAC Foil Tape: For sealing ductwork after inspection or repair.
- Sheet Metal Screws: For re-securing duct sections or patches.
- Tin Snips (Optional): If you need to cut into ductwork to gain access.
- Flashlight or Headlamp: For illuminating dark duct interiors.
- Multimeter (for Automatic Dampers): To test electrical connections and motor functionality.
- Adjustable Wrench or Pliers: For tightening nuts and bolts.
- Small Brush or Shop Vac: For cleaning out debris.
Safety Precautions:
- Turn Off Power: Always turn off your HVAC system at the thermostat and, crucially, at the circuit breaker before performing any work on the ductwork or electrical components.
- Wear Protective Gear: Gloves and safety goggles are non-negotiable when working with sheet metal ducts, which can have sharp edges.
- Work with a Partner: For tasks involving reaching into tight spaces or handling duct sections, having a second person can improve safety and efficiency.
- Be Mindful of Electrical Wiring: If troubleshooting an automatic damper, be extremely cautious around electrical connections, even after turning off the power.
- Avoid Forcing Components: If a damper is stuck, investigate the cause rather than forcing it, which could cause further damage.
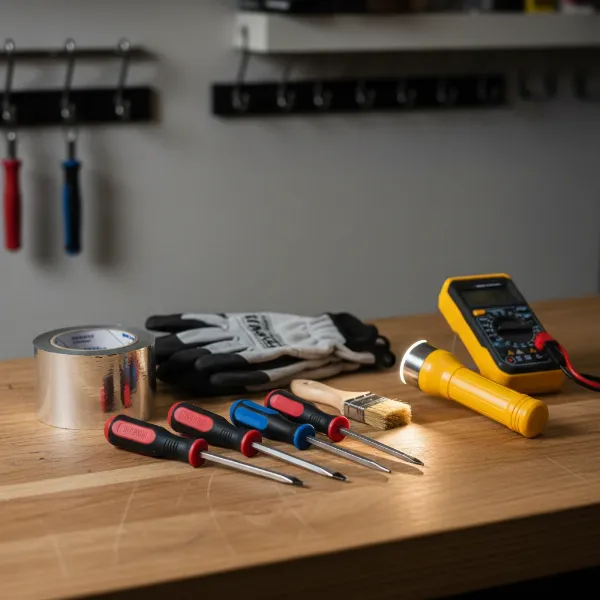 A collection of essential tools for HVAC damper repair including screwdrivers, gloves, tape, and a flashlight.
Step-by-Step Guide to Fixing a Manual Damper
Manual dampers are generally simpler to fix due to fewer moving parts and no electrical components.
- Locate the Damper: Follow the ductwork from your main HVAC unit towards the affected room. Manual dampers usually have an external lever or screw on the duct.
- Inspect Externally: Check the handle or screw mechanism. Is it loose? Is the lever able to move freely, or does it feel jammed? Sometimes, simply tightening a loose nut on the damper shaft can resolve the issue. If the handle spins freely but the damper isn’t moving, the linkage inside might be disconnected or broken.
- Access the Damper (If Necessary):
- Option A: Existing Access Panel: Some duct sections might have a small, removable access panel. Carefully remove the screws or clips to open it.
- Option B: Cutting into Ductwork: If there’s no access, you might need to cut a small, rectangular opening in the duct using tin snips. Aim for a spot where the damper shaft enters the duct, ensuring you can see and reach the flap. Proceed with caution and be prepared to patch the hole securely afterwards.
- Clear Obstructions: Once you have access, use your flashlight to inspect the damper flap and the surrounding duct interior. Look for any debris, dust, or insulation that might be blocking its movement. Gently clear away any obstructions with a brush or your hand (while wearing gloves).
- Check for Loose or Broken Linkage: Examine where the external handle or screw connects to the internal damper flap. If a nut has come off the shaft, re-secure it, possibly with a lock-nut for added durability. If the shaft itself is bent or the flap is disconnected, you may need to straighten the shaft or re-attach the flap using small sheet metal screws if possible.
- Test Operation: Manually move the damper flap back and forth to ensure it swings freely without binding against the duct walls. Operate the external handle/screw to confirm it now controls the internal flap properly.
- Seal the Ductwork: If you cut an access hole, use a piece of sheet metal slightly larger than the hole as a patch. Secure it with sheet metal screws and seal all edges thoroughly with HVAC foil tape to prevent air leaks. For existing access panels, ensure they are tightly re-secured.
Troubleshooting and Repairing Automatic (Zone) Dampers
Automatic dampers involve electrical components and can be more complex. If you’re uncomfortable with electrical work, it’s best to call an HVAC professional.
- Identify Damper Type: Confirm it’s an automatic damper, usually recognized by an attached motor or actuator housing.
- Check Power to the Actuator:
- With the HVAC system and zoning system (if applicable) turned on and calling for air in the affected zone, use a multimeter to test for voltage at the actuator’s terminals. Refer to the damper’s specific wiring diagram (often found on the actuator itself or in the HVAC system manual) for the correct voltage readings (usually 24V AC).
- No voltage indicates an issue with the wiring, thermostat, or zone control panel, not necessarily the damper itself.
- Correct voltage but no movement suggests a faulty actuator motor.
- Inspect Wiring and Linkages:
- Ensure all wires connected to the actuator are secure and free from damage. Loose connections can prevent the motor from receiving power.
- Examine the linkage between the actuator and the damper shaft. It should be securely attached and move smoothly. Sometimes, a set screw on the linkage can loosen, causing the motor to spin without moving the damper. Tighten any loose set screws.
- Test Actuator Movement (Disconnected):
- Carefully disconnect the linkage arm that connects the actuator to the damper shaft.
- Try to manually move the damper flap by hand. If it moves freely, the issue is likely with the actuator. If it’s still stiff, the damper itself might be binding (due to debris, corrosion, or misalignment, as with manual dampers).
- With the linkage disconnected and power restored, observe the actuator. Does it cycle open and closed when the system calls for air in that zone? If not, the actuator is likely faulty.
- When to Replace Motor/Actuator: If the actuator receives power but doesn’t move the damper, or if it makes grinding noises, it usually needs replacement. Actuators are typically specific to the damper brand and model, so ensure you get the correct replacement part. Installation usually involves disconnecting the old wiring, unmounting the old actuator, mounting the new one, and re-connecting the wiring and linkage.
- When to Call a Professional:
- If the issue is with the zone control panel or thermostat.
- If you’re uncomfortable working with electrical components or inside ductwork.
- If the damper flap itself is severely damaged, bent, or corroded beyond simple cleaning/tightening.
- If, after troubleshooting, the problem persists, or you suspect a more complex HVAC system issue.
> “While many damper issues are DIY-friendly, electrical troubleshooting for automatic dampers can be complex. Don’t hesitate to call a certified HVAC technician if you’re uncertain or dealing with a persistent problem; they have the specialized tools and expertise.” – Admin, Reviewike.com HVAC Technician
Preventive Maintenance for Your Ductwork Dampers
A little proactive care can go a long way in preventing stuck dampers and maintaining optimal HVAC performance.
- Regular Duct Cleaning: Periodically have your ductwork professionally cleaned to minimize the accumulation of dust and debris that can jam damper flaps. This is especially important if you have pets or live in a dusty environment.
- Inspect Annually: During seasonal HVAC maintenance (e.g., before summer cooling and winter heating), take a moment to visually inspect any accessible dampers. For manual dampers, gently move the lever through its full range of motion to ensure it operates smoothly. For automatic dampers, observe them during a system cycle to confirm they open and close.
- Change Air Filters Regularly: A clean air filter is crucial for preventing dust and particles from entering your ductwork and potentially clogging dampers. Follow manufacturer recommendations for filter replacement, typically every 1-3 months.
- Lubricate Moving Parts (Manual Dampers): For older manual dampers, a small amount of silicone-based lubricant on the pivot points (where the shaft enters the ductwork) can help ensure smooth operation, though avoid excess which can attract dust. Do not lubricate automatic damper actuators.
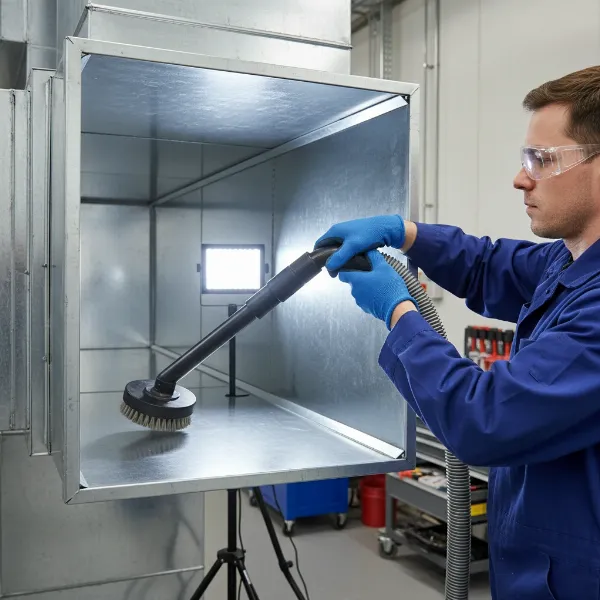 A person cleaning HVAC ductwork to prevent damper issues and ensure efficient airflow.
Conclusion
A stuck damper flap can be a significant source of discomfort and inefficiency in your home, but often, it’s a problem you can tackle yourself. By understanding how dampers work, recognizing the signs of a blockage, and knowing the common causes, you’re well-equipped to diagnose the issue. Whether it’s clearing debris from a manual damper or troubleshooting an automatic actuator, following these steps can help you restore proper airflow and bring balanced comfort back to your living space. Regular maintenance, including diligent filter changes and periodic duct inspections, will ensure your damper flaps remain free-moving and your HVAC system operates at its best. Don’t let a small component like a stuck damper compromise your home’s climate control—take action and enjoy the even comfort you deserve.
Are your rooms finally enjoying balanced temperatures, or are you still battling hot and cold spots?
Frequently Asked Questions
Can a stuck damper damage my HVAC system?
|
Our Picks for the Best Range hood in 2026
As an Amazon Associate I earn from qualifying purchases.
|
||
| Num | Product | Action |
|---|---|---|
| 1 | COSMO COS-63175S 30 in. Vista Collection 380 CFM Ducted Wall Mount Range Hood, Touch Controls, LED Lights, Stainless Steel |

|
| 2 | Broan-NuTone BCSQ130SS Three-Speed Glacier Under-Cabinet Range Hood with LED Lights ADA Capable, 1.5 Sones, 375 Max Blower CFM, 30-Inch, Stainless Steel |
|
| 3 | IKTCH 30-inch Wall Mount Range Hood 900 CFM Ducted/Ductless Convertible, Kitchen Chimney Vent Stainless Steel with Gesture Sensing & Touch Control Switch Panel, 2 Pcs Adjustable Lights(IKP02-30'') |
|
| 4 | COMFEE' CVU30W2AST Range Hood 30 Inch Ducted Ductless Vent Hood Durable Stainless Steel Kitchen Hood for Under Cabinet with 2 Reusable Filter, 200 CFM, 2 Speed Exhaust Fan Silver |
|
| 5 | VIKIO HOME Wall Mount Range Hood 30 inch, 580 CFM, Ducted/Ductless Convertible, Stainless Steel Kitchen Vent Hood with 3-Speed Fan and LED Lights |
|
| 6 | SNDOAS 30 inch Range Hood Ducted/Ductless Convertible Stainless Steel Range Hood Under Cabinet with Rocker Button Control,Vent Hood with LED Light,2 Speed Exhaust Fan,Under Cabinet Hood,Silver |
|
| 7 | COMFEE' CVU30W4AST 30 inch Under Cabinet Ducted/Ductless Convertible Slim Vent Durable Stainless Steel Kitchen Reusable Filter, 3 Speed Exhaust Fan and 1 LED Lights Range Hood, 2.0 Version |
|
| 8 | AMZCHEF Under Cabinet Range Hood 30 Inch, 750CFM Stainless Steel Kitchen Stove Vent Hood 3 Speed Exhaust Fan Touch/Remote/Gesture Control LED lights Time Setting Dishwasher-Safe Baffle Filters |
|
| 9 | Empava Wall Mount Range Hood 30 Inch, Ducted/Ductless Kitchen Exhaust Stove Vent with Modern Style, 400CFM, 3-Speed, Touch Control, Timer, LED Lights, Stainless Steel (Charcoal-Filter Sold Separately) |
|
| 10 | Broan-NuTone 413001 Non-Ducted Ductless Range Hood with Lights Exhaust Fan for Under Cabinet, 30-Inch, White |
|
Yes, a consistently stuck damper can put a strain on your HVAC system. It can restrict airflow, causing your system to work harder to push air through, potentially leading to increased energy consumption, premature wear on components like the blower motor, and uneven temperature distribution that overworks the unit.
How often should I check my dampers?
It’s a good practice to visually inspect accessible dampers annually, ideally during your routine seasonal HVAC maintenance checks. For manual dampers, gently operate the lever. For automatic dampers, observe their movement during a system cycle. Regular air filter changes also indirectly help prevent damper issues by reducing debris in the ductwork.
What’s the difference between a manual and automatic damper?
A manual damper is adjusted by hand using an external lever or screw on the ductwork, providing basic control over airflow to a zone. An automatic damper, also known as a zone damper, is motorized and controlled by a thermostat or zoning control panel, allowing for automated and precise airflow regulation to different areas of your home.
Is it okay to just remove a stuck damper?
While you might temporarily remove a stuck damper to restore airflow, it’s not a long-term solution. Dampers are integral to balancing your HVAC system and maintaining temperature control in different zones. Removing one can lead to uncontrolled airflow, energy waste, and potentially discomfort in other areas of your home. It’s always best to repair or replace a faulty damper.