A well-lit kitchen is essential for safe and enjoyable cooking. When your range hood light suddenly goes dark, it can disrupt your culinary tasks and create an unwelcome shadow over your stovetop. Don’t let a non-functional light dim your kitchen experience. This guide will walk you through a systematic troubleshooting process, helping you diagnose the problem and get your range hood light shining brightly again. From simple bulb replacements to more complex electrical checks, we’ll cover the steps you can take to restore illumination to your cooking space.
Common Reasons Your Range Hood Light Isn’t Working
Before diving into repairs, understanding the potential culprits behind a dead range hood light can save you time and effort. Several factors, ranging from minor issues to more significant electrical faults, can cause your light to stop working. Pinpointing the most likely cause is the first step toward a successful fix.
Here are the most common reasons your range hood light might refuse to turn on:
- Burned-Out Light Bulb: This is often the simplest and most frequent cause. Like any bulb, those in your range hood have a finite lifespan and will eventually burn out. A quick visual inspection can sometimes confirm this, showing a darkened filament or a black residue inside the glass.
- Faulty Light Switch: Constant use can lead to wear and tear on the light switch. Internal components can fail, preventing the electrical current from reaching the bulb. This might manifest as the switch feeling loose, sticky, or simply unresponsive when pressed.
- Power Supply Issues: The problem might not be with the range hood itself, but with its power source. A tripped circuit breaker, a blown fuse, a loose plug connection, or even a faulty electrical outlet can cut off power to your appliance, affecting both the fan and the lights.
- Loose or Damaged Wiring: Over time, vibrations or accidental tugs can cause internal wires to become loose at their connections. Wires can also fray or get singed, interrupting the electrical flow to the light assembly.
- Defective Light Socket: Even with a good bulb, a faulty socket can prevent illumination. Corrosion, bent contacts, or internal damage within the socket itself can hinder proper electrical contact with the bulb’s base.
- Failed Transformer: Many range hoods, especially those with low-voltage halogen or LED lighting systems, utilize a transformer to convert household voltage to the lower voltage required by the lights. If this transformer fails, the lights will not receive power.
- Control Board Malfunction: In more advanced range hood models with electronic controls, a damaged or malfunctioning control board can fail to send the necessary signals to activate the lights. This is a less common but more complex issue.
Step-by-Step Troubleshooting Your Range Hood Light
Tackling a range hood light repair requires a methodical approach, starting with the simplest solutions and progressing to more intricate diagnostics. Remember, safety is paramount whenever working with electricity.
Step 1: Prioritize Safety – Always Disconnect Power
Before attempting any inspection or repair, always disconnect power to your range hood. Failing to do so can result in serious electrical shock or injury.
- Locate your home’s main electrical panel (breaker box).
- Find the circuit breaker labeled for your kitchen or specifically for the range hood.
- Flip the breaker to the “OFF” position.
- Verify power is off by trying to turn on the range hood light or fan. If neither works, the power is successfully disconnected.
Step 2: Check and Replace the Light Bulb
The simplest solution is often the correct one. A burned-out bulb is the most common reason a range hood light fails.
- Access the Bulb: Carefully remove any light cover or lens that protects the bulb. This might involve twisting, unscrewing, or unlatching clips, depending on your range hood model.
- Inspect the Bulb: Look for visual cues like a broken filament, a dark or blackened glass, or a milky white appearance inside the bulb, all indicating it has burned out.
- Remove the Old Bulb: For screw-in bulbs, turn counter-clockwise. For halogen or LED puck lights, they may pull straight out or require a slight twist.
- Identify the Correct Replacement: Note the bulb type (incandescent, halogen, LED), wattage, voltage, and base type. Using the wrong bulb can cause further issues or simply won’t work.
- Insert the New Bulb: Screw or push the new bulb firmly into the socket. If replacing a halogen bulb, avoid touching the glass with bare hands as oils can cause premature failure. Use a paper towel or gloves.
- Test: Reinstall the light cover, restore power at the circuit breaker, and try turning on the light. If it works, congratulations—your problem is solved!
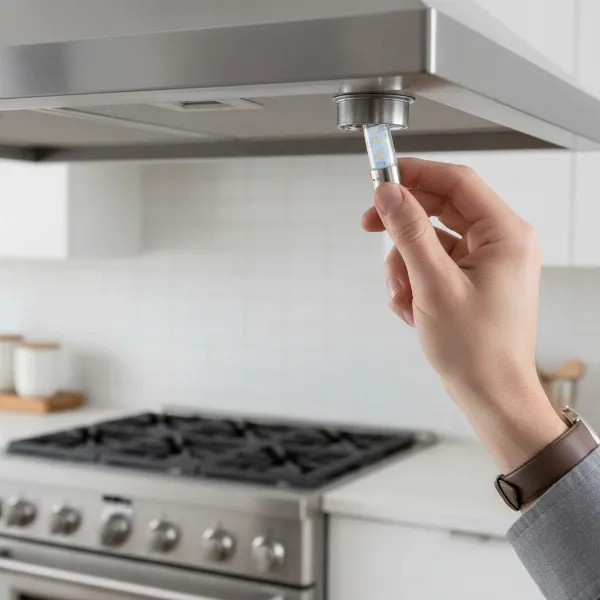 A close-up of a hand carefully replacing a small LED bulb in a range hood light socket.
Step 3: Inspect the Power Supply
If replacing the bulb didn’t work, the issue might stem from the power source itself.
- Check the Plug (if applicable): Some range hoods plug into a standard outlet. Ensure the cord is securely plugged in and hasn’t been accidentally pulled out.
- Examine the Circuit Breaker/Fuse: Even if you flipped it off in Step 1, double-check that the circuit breaker for your range hood hasn’t tripped again. If your home uses fuses, inspect the fuse for a blown filament and replace it if necessary.
- Test the Outlet (if accessible): If your range hood plugs into an accessible outlet, unplug the hood and plug in another small appliance (like a phone charger or lamp). If the other appliance doesn’t work, the outlet itself might be faulty and require attention from an electrician.
Step 4: Examine the Light Switch
A faulty light switch is a common culprit when the bulb isn’t the issue.
- Access the Switch: You’ll likely need to remove the control panel or a section of the hood to reach the light switch and its wiring.
- Visual Inspection: Look for any visible signs of damage, such as burnt marks, loose wires connected to the switch terminals, or a switch that feels unusually stiff or flimsy.
- Test for Continuity with a Multimeter:
- Set your multimeter to the continuity or resistance (ohms) setting.
- With the power still off, disconnect the wires from the light switch.
- Touch one probe of the multimeter to each terminal of the switch.
- Toggle the switch through its “on” and “off” positions.
- A functioning switch should show a reading close to zero ohms (or beep for continuity) in the “on” position and an open circuit (no reading) in the “off” position. If it doesn’t, the switch is defective and needs replacement.
- Replace the Switch: If the switch is faulty, replace it with an exact match from the manufacturer or a compatible universal switch. Reconnect the wires securely.
> “Many range hood lighting problems can be resolved with basic tools and a bit of patience. However, always prioritize safety by disconnecting power. When in doubt about electrical work, it’s always best to consult a certified technician.” – John Doe, Master Appliance Technician
Step 5: Troubleshoot the Light Socket
Sometimes the light bulb and switch are fine, but the socket itself is the problem.
- Visual Inspection: With the bulb removed and power off, examine the inside of the socket. Look for corrosion, bent metal tabs (contacts), or signs of burning.
- Clean the Socket: Gently clean any visible corrosion or debris using a small brush or cotton swab with rubbing alcohol. Carefully bend any flattened metal tabs slightly outward to ensure good contact with the bulb.
- Test for Power (Advanced): If you are comfortable and capable of working with live electricity and have verified proper safety precautions, you can use a multimeter set to AC voltage to check if power is reaching the socket terminals when the light switch is on. If there’s power to the socket but a new bulb won’t light, the socket itself is likely defective.
- Replace the Socket: If the socket is damaged or not receiving power despite power reaching the switch, it may need to be replaced. Ensure the replacement socket is compatible with your hood and wiring.
Step 6: Investigate Wiring Issues
Loose or damaged wiring can interrupt the flow of electricity to your lights.
- Visual Check: With the power off, carefully inspect all visible wiring leading to the light assembly, switch, and power source. Look for loose connections, frayed insulation, or wires that appear burnt or discolored.
- Tighten Connections: Gently tug on wire connectors to ensure they are secure. If you find any loose wire nuts, re-twist them firmly.
- Repair or Replace: If you find frayed or burnt wires, they will need to be repaired or replaced. This type of electrical work can be complex and dangerous. If you are not experienced, it is strongly recommended to call a professional.
Step 7: Test the Transformer (for Low-Voltage Lights)
If your range hood uses low-voltage bulbs (typically halogen or some LEDs), it will have a transformer. If the transformer fails, the lights won’t work.
- Locate the Transformer: The transformer is usually a small, rectangular box located near the light assembly or inside the hood’s casing.
- Test with a Multimeter (Advanced):
- With power restored and the light switch ON, set your multimeter to AC voltage.
- Carefully test the input voltage to the transformer. It should match your household voltage (e.g., 120V in North America).
- Then, test the output voltage from the transformer to the light assembly. This voltage will be lower (e.g., 12V or 24V), as indicated on the transformer itself.
- If the input voltage is present but there’s no output voltage (or a significantly lower one), the transformer is likely defective.
- Replace the Transformer: If faulty, replace the transformer with one of the identical voltage and wattage ratings.
Step 8: Consider the Control Board
If you’ve systematically worked through all the above steps and the light still won’t turn on, especially if other electronic functions are also acting erratically, a malfunctioning control board could be the culprit.
- Symptoms: This can include inconsistent light operation, non-responsive buttons, or general electrical glitches.
- Professional Help: Control board issues are complex and often require specific diagnostic tools and expertise. It’s generally best to consult a professional appliance technician for diagnosis and replacement.
Essential Tools for Range Hood Light Repair
Having the right tools on hand can make the troubleshooting and repair process much smoother.
- Screwdrivers: Phillips and flathead screwdrivers for removing covers and panels.
- Multimeter: Crucial for testing continuity in switches and sockets, and for checking voltage at the power supply and transformer.
- Replacement Light Bulbs: Always have the correct type and wattage on hand.
- Work Gloves: Protect your hands, especially when handling halogen bulbs or working with sharp edges.
- Needle-nose Pliers: Useful for manipulating small wires or contacts.
- Wire Strippers/Cutters (optional): If you need to replace wiring or a switch.
- Electrical Tape (optional): For insulating connections if making repairs.
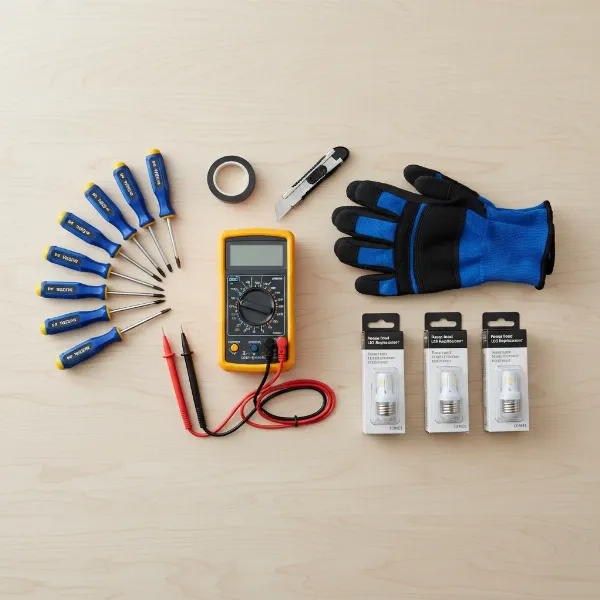 A collection of tools including a multimeter, screwdrivers, and work gloves on a workbench, ready for appliance repair.
When to Call a Professional Appliance Technician
While many range hood light issues can be resolved with DIY troubleshooting, there are times when calling a professional is the safest and most efficient course of action.
- Uncomfortable with Electrical Work: If you are not confident working with electricity or using a multimeter, it’s always best to defer to an expert. Electrical repairs can be dangerous if not performed correctly.
- Complex Wiring or Control Board Issues: If your troubleshooting points to problems with internal wiring that you can’t easily identify or repair, or if you suspect a faulty control board, a technician has the specialized knowledge and tools for accurate diagnosis and repair.
- After Exhausting Basic Troubleshooting: If you’ve diligently followed all the steps in this guide and the light remains off, it indicates a more intricate problem that warrants professional attention.
- Warranty Concerns: If your range hood is still under warranty, attempting complex repairs yourself might void it. Check your manufacturer’s warranty policy before proceeding with significant repairs.
Conclusion
A dark range hood light doesn’t have to be a permanent fixture in your kitchen. By systematically checking the bulb, power supply, switch, socket, wiring, and potentially the transformer, you can often identify and resolve the issue yourself. Remember to prioritize safety by always disconnecting power before starting any work. While many fixes are straightforward, knowing when to call a professional ensures both your safety and the proper functioning of your appliance. With a little investigative work, you can bring light back to your cooking area and enjoy a fully functional kitchen once more.
What was the most challenging part of troubleshooting your range hood light, and what solution finally worked for you?
Frequently Asked Questions
Why does my new range hood light bulb still not work?
If a new bulb doesn’t light up, the problem likely lies beyond the bulb itself. Possible causes include a faulty light switch, a defective light socket, power supply issues (like a tripped circuit breaker), or loose wiring. It could also be a failed transformer if your range hood uses low-voltage lighting. Always ensure the new bulb is the correct type and wattage for your specific hood model.
How do I know what type of light bulb my range hood needs?
The type of light bulb your range hood requires is usually indicated in the appliance’s user manual. If you don’t have the manual, remove the old bulb and look for specifications printed on its base or glass, such as wattage (W), voltage (V), and base type (e.g., E12, GU10). Common types include incandescent, halogen, and LED bulbs.
Is it safe to use my range hood if the light isn’t working?
Generally, yes, it is safe to use your range hood if only the light is not working, assuming the fan and other components are functioning correctly and there are no signs of electrical arcing or burning smells. However, it’s always best to address the lighting issue promptly to ensure proper visibility while cooking and to prevent any potential minor electrical problems from escalating.
Can I fix a flickering range hood light?
A flickering Range Hood light often indicates a loose connection, a failing bulb, or an unstable power supply. Start by tightening the bulb in its socket. If that doesn’t work, replace the bulb. If flickering persists, inspect the light socket and wiring for any looseness or corrosion. In some cases, a dimmer switch or transformer may be failing, requiring replacement.