The aroma of a delicious meal is one of life’s simple pleasures, but lingering cooking odors, grease, and smoke in your kitchen are not. An under-cabinet range hood is a powerful solution, efficiently clearing the air and keeping your cooking space fresh. While it might seem like a daunting task, installing an under-cabinet range hood yourself is a rewarding home improvement project that can save you money and give you a profound sense of accomplishment. This comprehensive guide will walk you through every step, ensuring a smooth and successful installation, whether you’re dealing with a ducted or ductless system.
Understanding Under-Cabinet Range Hoods: Ducted vs. Ductless Systems
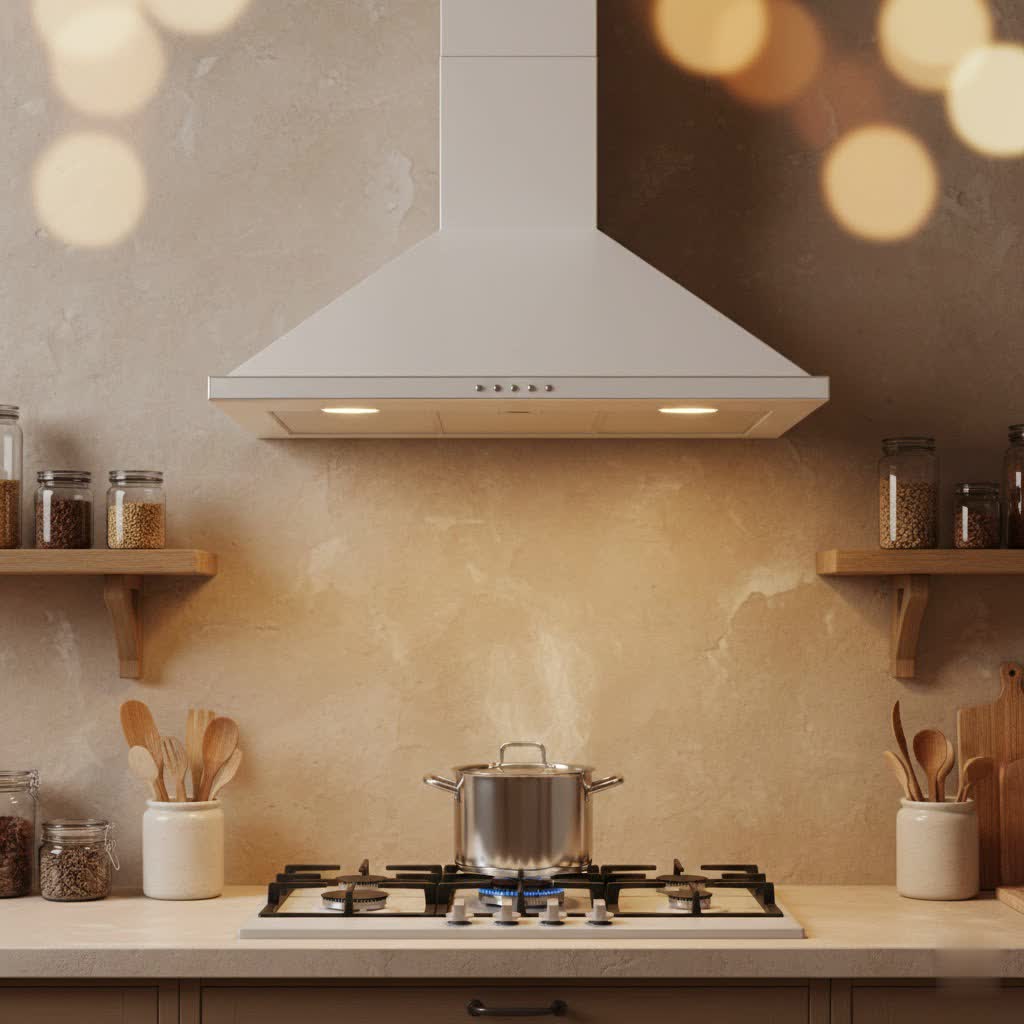
Under-cabinet range hoods are designed to fit snugly beneath your kitchen cabinetry, offering a streamlined look and effective ventilation directly above your cooktop. Before diving into installation, it’s crucial to understand the two main types: ducted and ductless.
A ducted range hood draws cooking fumes, smoke, and grease particles from the kitchen, through a filter, and then expels them outside your home via a system of ductwork. This method offers the most effective ventilation, permanently removing pollutants from your indoor air. Installation requires access to an exterior wall or roof for venting, which might involve cutting new holes if you’re not replacing an existing ducted unit.
In contrast, a ductless (recirculating) range hood works by pulling air through a filter, typically a charcoal filter, which removes odors and grease. The cleaned air is then recirculated back into the kitchen. While not as effective at removing heat and moisture as ducted systems, ductless hoods are an excellent option for apartments or homes where external venting isn’t feasible or cost-effective. Their installation is generally simpler as no external ductwork is needed.
Choosing between ducted and ductless depends on your kitchen’s layout, your building’s regulations, and your ventilation needs. For maximum efficiency and air quality, ducted is always preferred.
Pre-Installation Checklist: Gathering Your Tools and Supplies
Before you begin, proper preparation is key. Having all your tools and supplies on hand will make the installation process much smoother and safer.
Essential Tools for Installation
You’ll need a variety of common household tools for this project:
- Drill: For pilot holes and securing mounting screws.
- Screwdriver Set: Both Phillips and flathead, for various fasteners.
- Level: To ensure your range hood is perfectly straight.
- Tape Measure: For accurate measurements and marking.
- Utility Knife: For cutting ductwork materials or trimming templates.
- Wire Strippers/Cutters: For electrical connections.
- Stud Finder: To locate wall studs for secure mounting (if applicable, though most mount to cabinets).
- Pencil or Marker: For marking measurements.
- Safety Glasses and Gloves: Always protect your eyes and hands.
|
Our Picks for the Best Range hood in 2026
As an Amazon Associate I earn from qualifying purchases.
|
||
| Num | Product | Action |
|---|---|---|
| 1 | Empava Wall Mount Range Hood 30 Inch, Ducted/Ductless Kitchen Exhaust Stove Vent with Modern Style, 400CFM, 3-Speed, Touch Control, Timer, LED Lights, Stainless Steel (Charcoal-Filter Sold Separately) |

|
| 2 | SNDOAS 30 inch Range Hood Ducted/Ductless Convertible Stainless Steel Range Hood Under Cabinet with Rocker Button Control,Vent Hood with LED Light,2 Speed Exhaust Fan,Under Cabinet Hood,Silver |
|
| 3 | COSMO COS-63175S 30 in. Vista Collection 380 CFM Ducted Wall Mount Range Hood, Touch Controls, LED Lights, Stainless Steel |
|
| 4 | IKTCH 30-inch Wall Mount Range Hood 900 CFM Ducted/Ductless Convertible, Kitchen Chimney Vent Stainless Steel with Gesture Sensing & Touch Control Switch Panel, 2 Pcs Adjustable Lights(IKP02-30'') |
|
| 5 | VIKIO HOME Wall Mount Range Hood 30 inch, 580 CFM, Ducted/Ductless Convertible, Stainless Steel Kitchen Vent Hood with 3-Speed Fan and LED Lights |
|
| 6 | COMFEE' CVU30W4AST 30 inch Under Cabinet Ducted/Ductless Convertible Slim Vent Durable Stainless Steel Kitchen Reusable Filter, 3 Speed Exhaust Fan and 1 LED Lights Range Hood, 2.0 Version |
|
| 7 | COMFEE' CVU30W2AST Range Hood 30 Inch Ducted Ductless Vent Hood Durable Stainless Steel Kitchen Hood for Under Cabinet with 2 Reusable Filter, 200 CFM, 2 Speed Exhaust Fan Silver |
|
| 8 | Broan-NuTone 413001 Non-Ducted Ductless Range Hood with Lights Exhaust Fan for Under Cabinet, 30-Inch, White |
|
| 9 | AMZCHEF Under Cabinet Range Hood 30 Inch, 750CFM Stainless Steel Kitchen Stove Vent Hood 3 Speed Exhaust Fan Touch/Remote/Gesture Control LED lights Time Setting Dishwasher-Safe Baffle Filters |
|
| 10 | Broan-NuTone BCSQ130SS Three-Speed Glacier Under-Cabinet Range Hood with LED Lights ADA Capable, 1.5 Sones, 375 Max Blower CFM, 30-Inch, Stainless Steel |
|
Required Supplies
Beyond your new range hood unit, gather these materials:
- New Range Hood Unit: Ensure it’s the correct size and type (ducted or ductless) for your space.
- Mounting Hardware: Usually included with the range hood.
- Ducting (for ducted systems): Appropriate size and length, typically rigid metal or semi-rigid aluminum.
- Duct Tape or Foil Tape (for ducted systems): To seal ductwork connections.
- Charcoal Filters (for ductless systems): Often included, but confirm they’re suitable for your model.
- Electrical Connectors/Wire Nuts: To safely connect the hood’s wiring.
- Caulk/Sealant: For sealing gaps around ductwork or the hood’s edges.
- Circuit Tester: To confirm power is off.
Safety First: Your Most Important Step
Electrical work can be dangerous. Always prioritize safety:
- Disconnect Power: Locate your kitchen’s circuit breaker and switch off the power to the area where you’ll be working. Use a circuit tester to confirm the power is off at the outlet or junction box.
- Wear Personal Protective Equipment (PPE): Safety glasses will protect your eyes from dust and debris, and gloves will prevent cuts and scrapes.
- Check for Utilities: Before drilling or cutting, especially if it’s a new installation, ensure you won’t hit any hidden electrical wires, water pipes, or gas lines. A stud finder with a wire detection feature can be helpful.
Preparing Your Kitchen for Installation
With your tools and supplies ready, it’s time to prepare your kitchen space for the new range hood.
Removing the Old Range Hood (If Applicable)
If you’re replacing an existing unit, carefully remove it:
- Disconnect Power: Double-check that the power is off at the circuit breaker.
- Unplug/Disconnect Wiring: If the old hood is plugged in, unplug it. If it’s hardwired, carefully disconnect the electrical wires from the junction box inside the hood.
- Remove Mounting Screws: Locate and remove the screws or bolts holding the old hood to the cabinet or wall. Have someone help you support the hood as you remove the last fasteners.
- Detach Ductwork (for ducted): Carefully disconnect the old ductwork from the hood and the exterior vent. You may need to remove old caulk or tape.
Measuring and Marking for the New Unit
Accurate measurements are crucial for a flush and level installation:
- Determine Hood Placement: Standard recommendations suggest installing the range hood 24 to 30 inches above an electric cooktop and 27 to 30 inches above a gas cooktop. Check your specific hood’s manual for manufacturer recommendations.
- Mark Mounting Points: Use the provided template (if available) or the range hood itself to mark the mounting screw locations on the underside of your cabinet. Use a level to ensure these marks are perfectly aligned.
- Outline Duct/Electrical Access (if new): If you need to cut new holes for ducting or electrical wiring, carefully trace the required openings based on your hood’s specifications and existing utilities.
Cutting Holes for Ducting and Electrical
This step is critical for new installations or if the new hood’s openings don’t match the old ones:
- Ducting Hole: For ducted hoods, you’ll need a hole through the cabinet and possibly an exterior wall or ceiling. Use a jigsaw or hole saw for clean cuts. Ensure the hole is slightly larger than the duct for easy fitting.
- Electrical Access Hole: Create an opening in the cabinet for the electrical wiring to pass through to the junction box inside the hood. This is typically a smaller hole.
- Ensure Structural Support: Verify that the cabinet underside is sturdy enough to support the weight of the range hood. If necessary, add wood blocking inside the cabinet for extra reinforcement.
Step-by-Step Installation: Ducted Under-Cabinet Range Hood
Installing a ducted range hood involves connecting it to an existing or new duct system that vents outside. This provides superior air purification by completely removing pollutants.
Step 1: Mount the Range Hood
Securing the hood to your cabinet is the foundational step.
- Attach Mounting Bracket (if applicable): Some models come with a separate mounting bracket that you attach to the cabinet first. Follow your manual’s instructions for precise placement and securing with screws.
- Lift and Attach the Unit: With assistance, carefully lift the range hood into position, aligning it with your marked screw points. Secure the hood to the cabinet using the provided mounting screws. Start by hand-tightening all screws, then use your drill to fully tighten them, ensuring the hood is level and snug against the cabinet.
Step 2: Connect the Ductwork
This step is crucial for efficient exhaust.
- Connect Ducting to Hood: Attach the appropriate size ducting (e.g., 6-inch round or 3.25×10-inch rectangular) to the exhaust port on top or back of the range hood. Use sheet metal screws to secure the duct to the hood’s collar.
- Run Ducting Through Cabinet/Wall: Guide the ductwork through the pre-cut hole in the cabinet and connect it to your existing or newly installed exterior vent system. Ensure the duct run is as short and straight as possible for optimal airflow.
- Seal Connections: Use metal foil tape or specialized duct mastic to seal all ductwork seams and connections. This prevents air leaks and maintains exhaust efficiency. Avoid using cloth-based duct tape, as it can degrade over time.
Step 3: Wire the Electrical
Connecting the range hood to your home’s electrical system requires careful attention to safety.
- Route Electrical Wires: Feed the electrical supply wires from the cabinet through the designated access hole into the range hood’s junction box.
- Make Connections: Inside the junction box, connect the wires:
- Black (hot) wire from the house to the black wire from the hood.
- White (neutral) wire from the house to the white wire from the hood.
- Green or bare copper (ground) wire from the house to the green or bare copper wire from the hood (or to the ground screw in the junction box).
- Secure Connections: Use wire nuts to secure all connections, ensuring they are tight. Tuck the wires neatly into the junction box and secure the cover plate.
Step 4: Test and Finish
The final checks ensure everything is working correctly and looks good.
- Restore Power: Go back to your circuit breaker and turn the power back on.
- Test Functions: Test all functions of the range hood: fan speeds, lights, and any special features. Listen for any unusual noises or vibrations.
- Apply Caulk: Apply a thin bead of caulk around the top and sides of the range hood where it meets the cabinet. This provides a finished look and helps seal any small gaps, preventing grease buildup.
Step-by-Step Installation: Ductless Under-Cabinet Range Hood
Ductless range hoods are a simpler alternative for spaces without external venting. The installation process is largely similar to ducted, with a key difference in how air is handled.
Step 1: Mount the Range Hood
Mounting a ductless hood follows the same principles as a ducted one, focusing on secure attachment to the cabinet.
- Attach Mounting Bracket (if provided): Secure any mounting brackets to the underside of the cabinet according to the manufacturer’s instructions.
- Lift and Attach the Unit: With a helper, carefully lift the range hood into position, aligning it with your pre-marked screw points. Use the provided mounting screws to firmly attach the hood to the cabinet. Ensure it’s level.
Step 2: Install Recirculation Kit/Filters
This is the defining step for a ductless system.
- Install Charcoal Filters: Ductless hoods require charcoal filters to absorb odors. These filters typically attach directly to the grease filters or to a dedicated bracket within the hood. Follow your specific model’s instructions for proper installation.
- Ensure Recirculation Vents are Clear: Ductless hoods often have vents on the front or top that direct the filtered air back into the kitchen. Ensure these are not obstructed by the cabinet or any other objects.
Step 3: Wire the Electrical
Just like with ducted models, electrical safety is paramount.
- Route Electrical Wires: Feed the electrical supply wires from your cabinet into the range hood’s junction box.
- Make Connections: Connect the house wires (black to black, white to white, ground to ground) to the hood’s wires using wire nuts.
- Secure Connections: Tuck the wires into the junction box and secure the cover plate.
Step 4: Test and Finish
A final test ensures your ductless hood is ready for use.
- Restore Power: Turn the power back on at your circuit breaker.
- Test Functions: Activate the fan at different speeds and turn on the lights. Listen for proper operation and confirm the air is recirculating effectively.
- Apply Caulk: Apply a neat bead of caulk around the perimeter of the range hood where it meets the cabinet for a clean, finished look and to prevent grease accumulation in crevices.
Common DIY Installation Challenges & Troubleshooting
Even with careful planning, DIY projects can present unexpected hurdles. Here are some common issues and how to address them:
- Electrical Issues (No Power/Lights Not Working): Always re-check your circuit breaker first. If it’s on, turn it off and re-examine your wire connections inside the junction box. Ensure all wire nuts are secure and that the black, white, and ground wires are connected correctly. A loose connection is often the culprit.
- Mounting Difficulties (Uneven/Wobbly Hood): If your hood isn’t level or feels wobbly, remove it and re-evaluate your mounting points. Your cabinet might be uneven, requiring shims to create a level surface. Ensure screws are driven into solid wood and are tight, but avoid over-tightening which can strip the wood.
- Ductwork Leaks or Poor Airflow (Ducted Systems): Check all duct connections for gaps. Use metal foil tape or duct mastic to seal any leaks. Ensure your duct run isn’t excessively long or has too many sharp bends, which restrict airflow. Also, confirm the exterior vent flap opens freely.
- Excessive Noise: A little noise is normal, but excessive rattling or humming can indicate an issue. Check that all mounting screws are tight, the ductwork isn’t vibrating against the cabinet, and the fan blades are clear of obstructions. Sometimes, an undersized duct can also cause increased noise due to restricted airflow.
Post-Installation Checklist & Maintenance Tips
Once your under-cabinet range hood is installed and operating smoothly, a few final checks and ongoing maintenance will ensure its longevity and effectiveness.
Post-Installation Checklist
- Confirm All Functions: Verify that all fan speeds, lights, and any other features are working as expected.
- Check for Stability: Gently push and pull on the hood to ensure it is firmly mounted and does not wobble.
- Inspect Seals: Ensure any caulk or sealant you applied is dry and has created a good seal around the hood’s edges.
- Review Manual: Take a moment to read through your range hood’s user manual for specific operating instructions and maintenance schedules.
Maintenance Tips for a Long-Lasting Range Hood
Regular maintenance is key to keeping your range hood performing its best:
- Clean Grease Filters Regularly: For both ducted and ductless hoods, grease filters should be cleaned frequently, typically every 3-6 weeks depending on cooking frequency. Most are dishwasher-safe or can be cleaned with hot, soapy water. Clogged filters significantly reduce efficiency.
- Replace Charcoal Filters (Ductless): Ductless range hoods rely on charcoal filters to absorb odors. These cannot be cleaned and must be replaced every 3-6 months, or more often with heavy use. Refer to your manual for the correct replacement filter type.
- Wipe Down Exterior: Clean the exterior of your range hood regularly with a mild cleaner and a soft cloth to prevent grease buildup and maintain its appearance.
- Check Ductwork (Ducted): Periodically inspect the visible sections of your ductwork for any signs of damage or leaks. Ensure the exterior vent flap is not obstructed by debris.
Installing an under-cabinet range hood DIY is a manageable project that can significantly improve your kitchen’s air quality and aesthetics. By following these steps carefully, prioritizing safety, and performing routine maintenance, you’ll enjoy a fresher, cleaner cooking environment for years to come. What improvements are you excited to see in your kitchen with your new range hood?
Frequently Asked Questions
How long does it take to install an under-cabinet range hood?
The installation time can vary depending on your experience and whether it’s a new installation or a replacement. Typically, replacing an existing hood can take 2-4 hours, while a completely new installation, especially if new ductwork or electrical needs to be run, might take 4-8 hours or more. Always allocate extra time for unexpected challenges.
Do I need an electrician to install a range hood?
For most standard under-cabinet range hood installations, particularly replacements where existing wiring is present, a DIY enthusiast can handle the electrical connections. However, if new wiring needs to be run from your electrical panel, a new circuit breaker installed, or if you’re uncomfortable with electrical work, hiring a qualified electrician is highly recommended for safety and compliance.
What’s the main difference between ducted and ductless installation?
The main difference lies in air expulsion. Ducted installation requires connecting the range hood to a ventilation system that expels air outdoors, involving ductwork. Ductless installation, conversely, recirculates filtered air back into the kitchen, requiring the installation of charcoal filters but no external ducting.
Can I replace an old ducted range hood with a ductless one?
Yes, you can often replace a ducted range hood with a ductless model. You would simply cap off or seal the existing ductwork in the cabinet and ensure the new ductless hood has its necessary charcoal filters installed for recirculation. This can be a simpler swap if external venting becomes problematic.
How high should an under-cabinet range hood be above the cooktop?
Most manufacturers recommend installing an under-cabinet range hood between 24 to 30 inches above an electric cooktop and 27 to 30 inches above a gas cooktop. Always consult your specific range hood’s manual and local building codes for precise recommendations, as these distances are crucial for optimal performance and safety.
What tools are absolutely essential for this DIY project?
For a successful DIY under-cabinet range hood installation, essential tools include a drill, a screwdriver set, a level, a tape measure, wire strippers, and crucial safety gear like safety glasses and gloves. Depending on your specific situation, a stud finder and a utility knife might also be indispensable.